Want to record a podcast, but not sure where to start? Don’t worry, it’s easier than you might think. In fact, podcast recording can be broken down into three simple stages:
- Preparation
- Equipment
- Software
We’ll go into each step in detail over the course of this article. But for now, check out what Colin Gray (founder of The Podcast Host) has to say about podcast recordings in the video below.
Planning Your Podcast Recording
The first step in the planning process is choosing your topic. Picking a topic avoids the pitfall of random rambling, helping to create a consistent tone throughout your show. It could be something that you’re really passionate about, or something that’s always intrigued you. But it has to be something that’s going to be heard. And there are ways of maximising this opportunity.
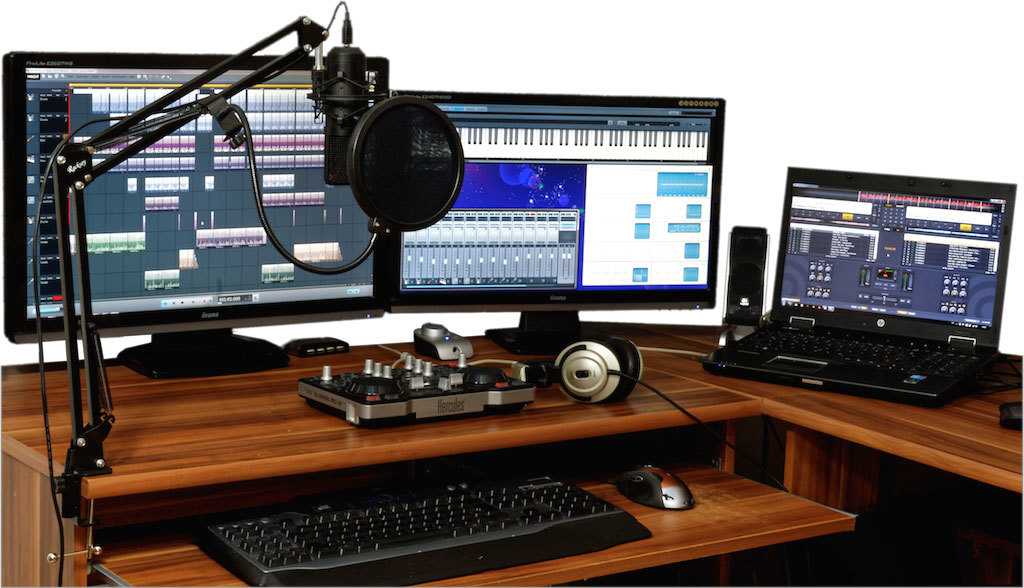
Firstly, think about the type of listener you want your podcast to appeal to. This can help with structuring what you’re going to say (more on that later), as you can cater specific talking points towards the audience you’re targeting. A few key points to consider include:
- How do you want to engage with your listeners?
- How do you want your listeners to engage with you?
- What topics will your listeners genuinely be interested in?
- What topics can you give listeners something valuable on?
- What topics aren’t already being covered on other leading shows in your niche?
You get the jist. Engaging with your audience is an effective way of shaping your episodes. It may provoke a talking point you wish to delve into in your next show, and can help tackle issues that people are struggling with. Make sure you do keyword research to look at what your audience is searching for, and help get yourself noticed.
Scripting Your Podcast
Once you’ve thought about your potential audience and topic, it’s time to work out what you’re going to say. Scripting is crucial, but there’s a variety of opinions on how far you should go with your script.
A short script gives plenty of room for improvisation, and a chance to showcase more personality or chemistry with co-hosts and guests. But if you’re not careful, this format can sound under-rehearsed, sloppy, and you’re in danger of forgetting what you’ve already covered.
A longer and more detailed script, however, can help ensure you’ve said everything you intended to say in an episode. And it’ll also give you a clear readout on the structure of your episodes.
That being said, there are downsides to doing so. Really detailed scripts can rob you of personality and spontaneity, which are arguably two key components of a successful podcast. Drafting longer scripts also takes time, which can be a bugbear if recording a podcast is a side hustle for you.
In short, there’s no clear-cut answer. Experiment with both and see which method works for you. Being comfortable and confident with your script set-up is the first obstacle to cross, and a longer script helps with finding your feet in the early stages. Once you’ve racked up enough confidence in your podcast persona, a shorter script could be the way to go in order to make room for off-the-cuff yet relevant conversations.
If you need some extra help crafting your podcast scripts, check out the handy templates in the below article.
5 Podcast Script Templates for Planning Your Episodes
So, What Equipment Do You Need to Record a Podcast?
Now you’ve got the idea, it’s time to get the gear. If you’re new to podcasting, we’d recommend starting off with basic equipment, and working your way up. Below are the essential bits you’ll need to initially invest in:
A Microphone
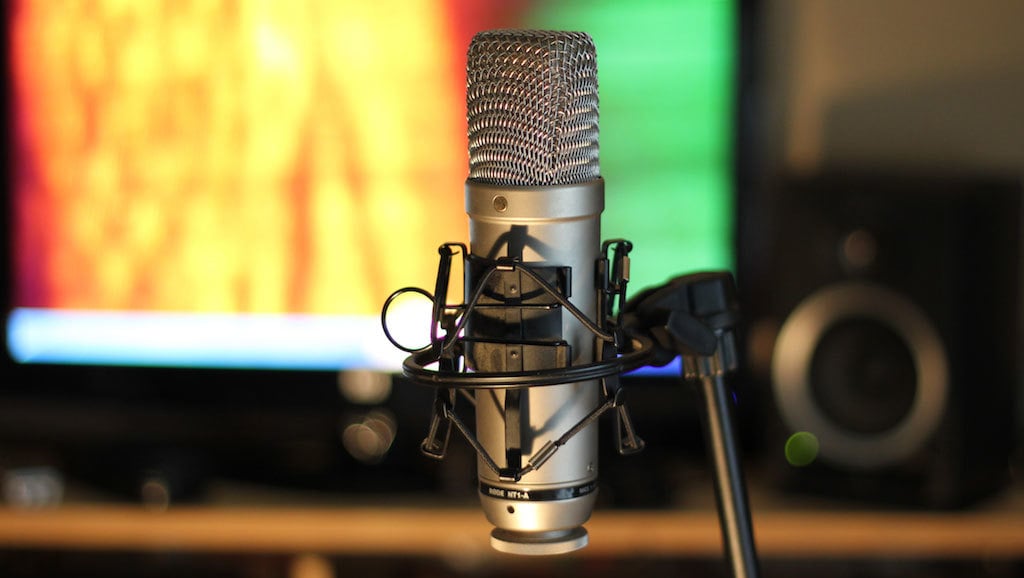
First things first. You can’t record a podcast without a good microphone. There are however different model types to choose from, which we’ve listed below. Have a read through and think about which ones will suit your show the best.
- Built-in: These were not designed for recording professional audio and as such, consider built-in mics as a temporary measure for getting the first couple of episodes under your belt, before moving on to something better.
- USB: USB mics, such as the Rode Podcaster, are a reliable starting point as they’re easy to use from the get go. They connect directly to your computer.
- Dynamic: These are designed to focus on your voice. The Shure SM7B is an ideal choice for the spoken word, as it ignores distant noises. If you’ve got multiple presenters, then a few of these hooked up to a mixer will do the job perfectly.
- Condenser: Considered the industry standard by professionals, the Rode NT1-A condenser records natural sounds. As a result, it picks up quiet audio, so you can use one of these to record multiple presenters.
A Pair of Headphones
You’ll also need to acquire a pair of podcast headphones for your recording sessions. And if you’re not sure where to start, think about your priorities. Comfort, budget and audio quality are all important, but which one matters to you the most? You can find a handy set of options in our guide below:
12 Podcast Headphones You Should Be Using
A Digital Recorder
If you’re recording a podcast with co-hosts or guests (and you’re doing it in-person), having a digital recorder is more practical than plugging multiple USB mics into a computer or laptop. The Zoom H4n is a decent option, while the Zoom H1n is a cheaper alternative. And once you get to know your way around them, you can always upgrade to the RØDECaster Pro for a more professional podcast recording setup.
A USB Audio Interface
These are ideal for podcasters purely operating on their computer, and are looking for an improved quality of audio. It works by connecting to your computer in the same way a USB microphone would. You then plug in your XLR mics and go from there.
What Software Do You Need to Record a Podcast?
Whether you’re recording at home or in the great outdoors, you still need editing software to help smooth out your podcast’s audio. For this guide, we’re using Audacity. It’s free, easy to use, and works with Windows, Mac, and Linux systems. However, if you want to dip your toe into something else, we’ve got a few more options for you:
- GarageBand: Widely used by musicians and podcasters alike, GarageBand is the default recording and editing software on Mac. Its range of audio effect plug-ins can help fine-tune the sound you want, plus the massive range of instruments at your disposal gives you plenty of room to experiment with your podcast’s sound.
- Adobe Audition: Packed with plenty of cool features, including waveform and multitrack, this subscription-based service is essential for professionals (although it comes with a steep learning curve).
- Audacity: As mentioned above, this one is free and easy to use. In fact, Audacity is the most-used amateur recording software for Windows, Mac, and Linux Systems.
- Logic Pro: Like GarageBand, this podcast recording software is produced by Apple, and made for Apple users. It’s a step up from GarageBand, with a wider choice of tools to help with sound recording, editing and the overall production. Highly recommended for in-person recordings.
- Hindenburg Pro: Built with aspiring podcasters in mind, Hindenburg Pro is arguably the best choice for sound quality. Featuring split-track recording and an auto-leveller allowing you to tweak your audio files as soon as you’ve finished recording, this makes for a superb choice among other podcast recording software.
If you want to expand your list of options, check out this full guide for the best podcast recording software programs around.
Where Should You Record Your Podcast?
Home studio or office set-ups are a reliable staple for recording podcasts. You have control over your environment with fewer distractions and better equipment, something you don’t get when recording outside. Plus, home recordings sound much more professional when taking place in a quiet area with everything already set up and ready to use.
But recording a podcast from home isn’t as simple as picking any room at random and experimenting. There are ways of creating a setup that is built with podcast recording in mind, without needing to soundproof an entire space. Pick the quietest spot, where you won’t have to worry too much about background noise, and remove objects such as fans to help reduce other sounds. Sidenote: carpeted rooms help dampen echoes.
If you're looking to produce a more professional sound from your home, we'd recommend buying a reflection filter. These can be fitted just behind your microphone to eliminate echoes, providing your podcast recordings with a studio-quality feel.
There are, however, other opportunities when taking your podcast on location. For one, recording interviews on your phone adds a bit of variety and a new perspective to your shows. And recording outside using iPhone’s Voice Memos or Android’s Voice Recorder can capture interesting conversation. Then you just send over the recording to your computer for editing.
Finding Guests for Your Podcast
Graham Norton wouldn’t have a show if he didn’t have the guests. And no-one would watch it if his sofa was filled with complete and utter bores. Furthermore, asking questions isn’t enough to guarantee interesting conversation. Part of the process is to find engrossing guests who will help to make your podcast compelling.
If that sounds like too much work though, don’t worry. MatchMaker.fm keeps the booking process simple, and it’s free to sign up. Just fill in a few details regarding your podcast, and you’ll gain access to thousands of guest profiles. The search function makes it easy to narrow down your choices for the type of guest you’re looking for, helping you book the most relevant person for your show.
How to Record a Podcast
Now it’s time to actually begin recording your podcast. You can’t go wrong with Audacity, our software of choice for this guide. Get started by downloading it here. Once open, it should look something like this…
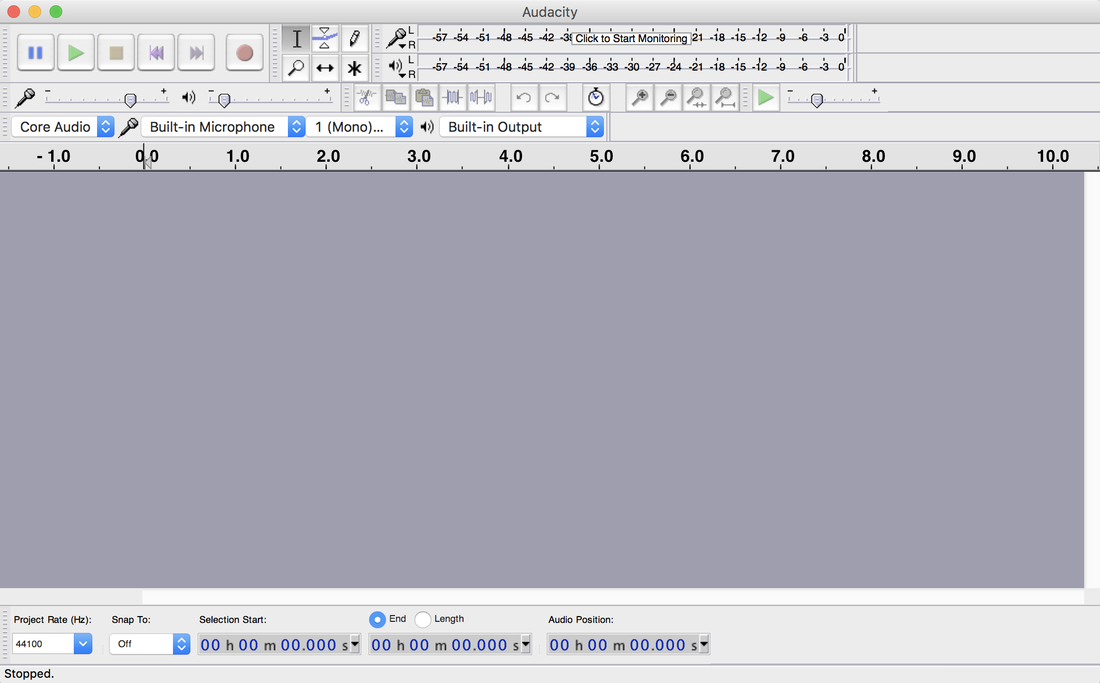
Audacity uses your built-in microphone to record, by default. As a result, ensure the one you want to use is selected from the drop-down menu located next to the microphone symbol (in our case that’s the Rode Podcaster).
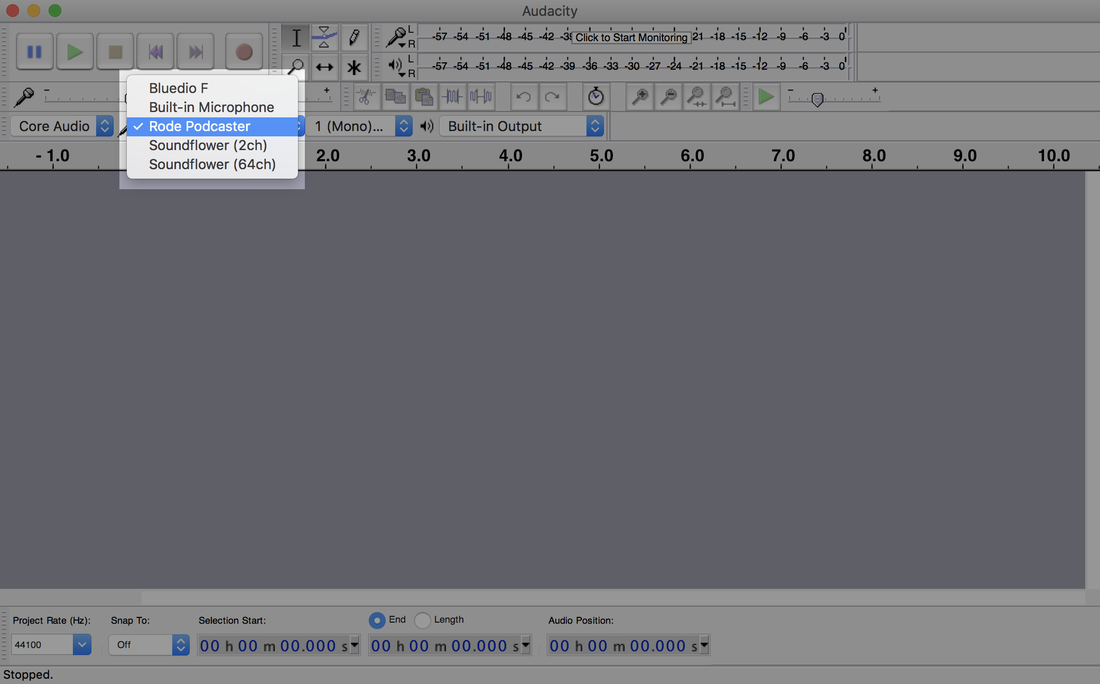
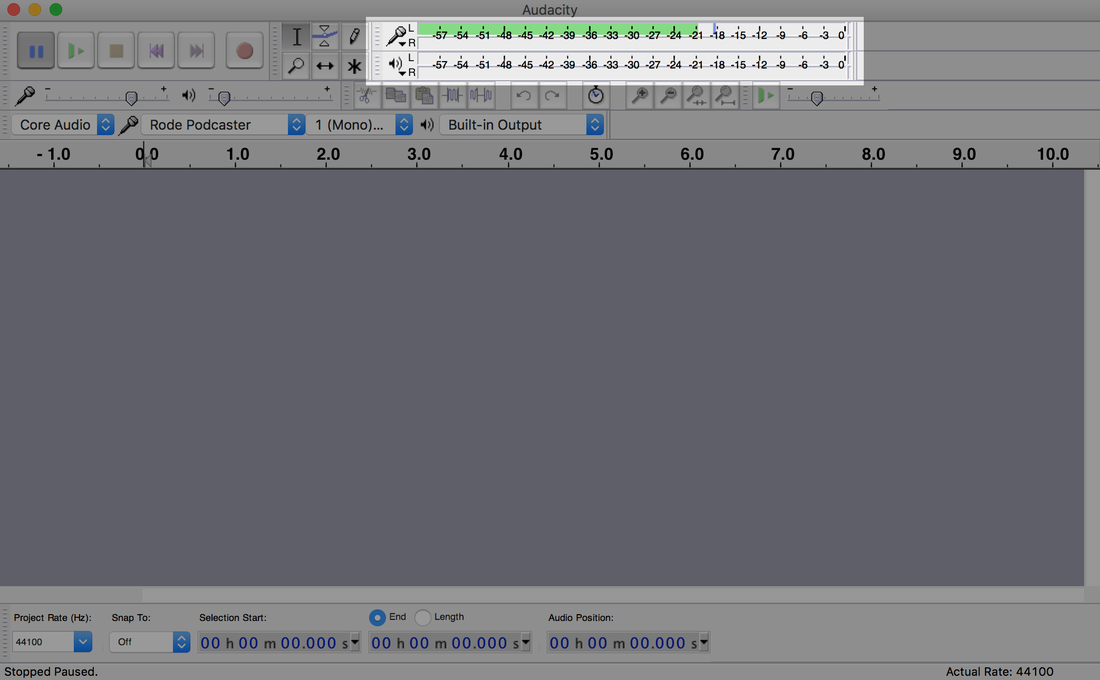
Is it working correctly? Monitor your microphone’s volume levels by clicking the input level bar.
When you’re ready to start recording your podcast, click the red button. Then, once your show concludes, click the stop button.
Forgot something you want to add to your podcast? Clicking the red button again starts a new audio track from the beginning. Instead, pause your recorded audio so you can pick up where you left off.
Pausing and Continuing
Recordings don’t always go to plan, and that’s ok. Even professional podcasters fluff what they’re saying and need a breather. Collect your thoughts and save yourself from editing endless amounts of audio using Audacity’s pause feature.
To take a break from recording your podcast, simply select the pause symbol. And when you’re ready to start back up, just click the pause button again.
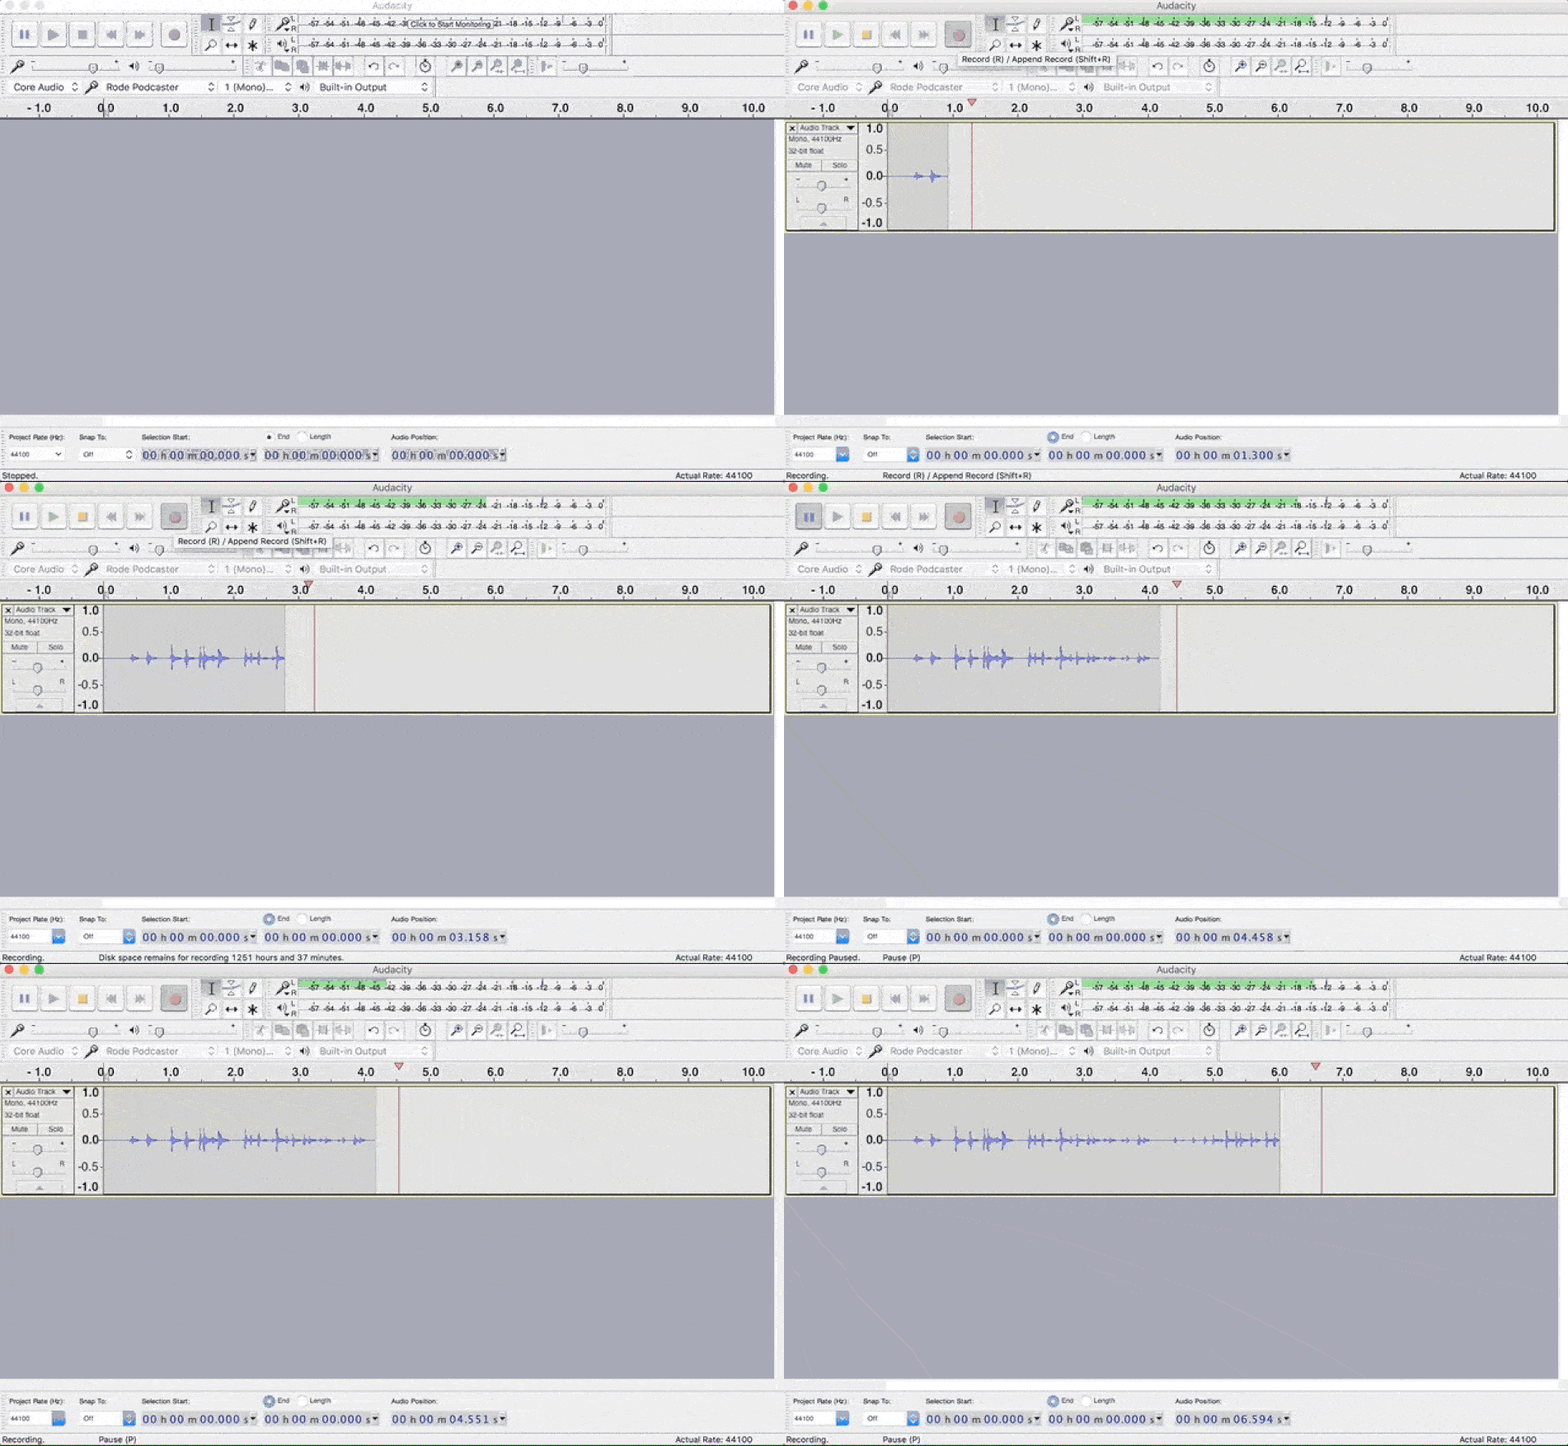
When you’ve finished, click the stop button to end your current audio track.
Exporting Your Podcast
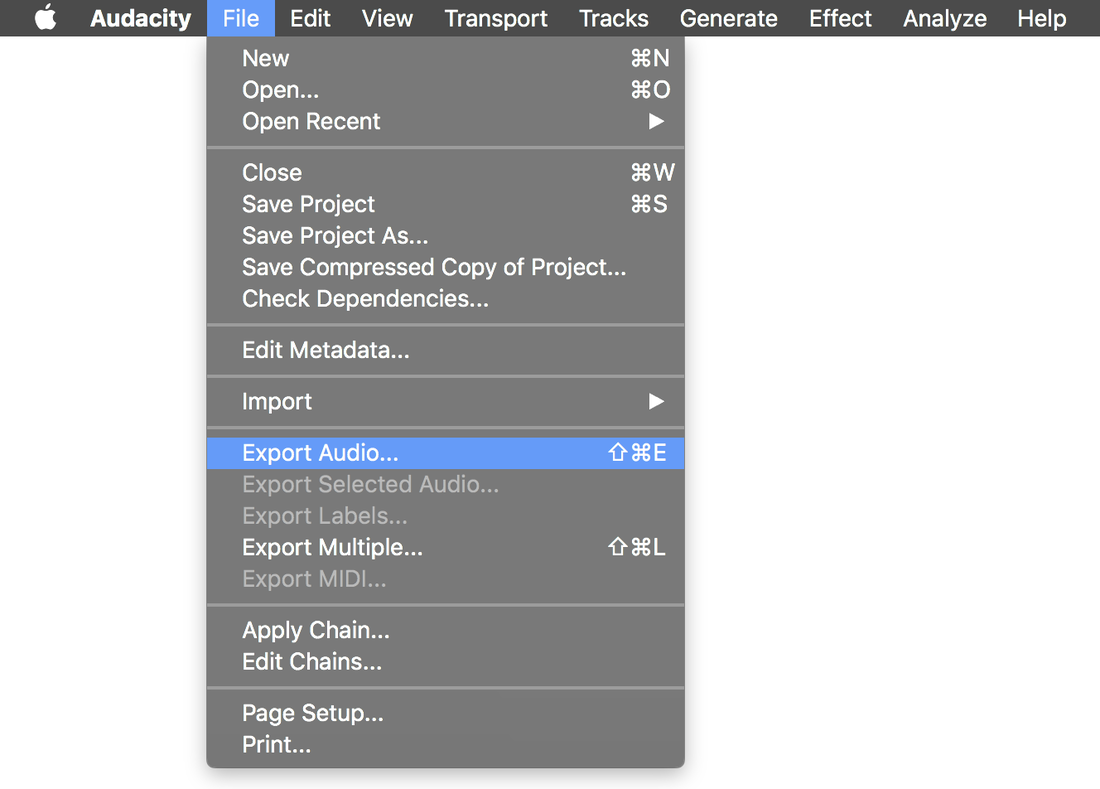
Once you’re happy with your recording, it’s time to package up your podcast by exporting it. To do this, go to File > Export Audio.
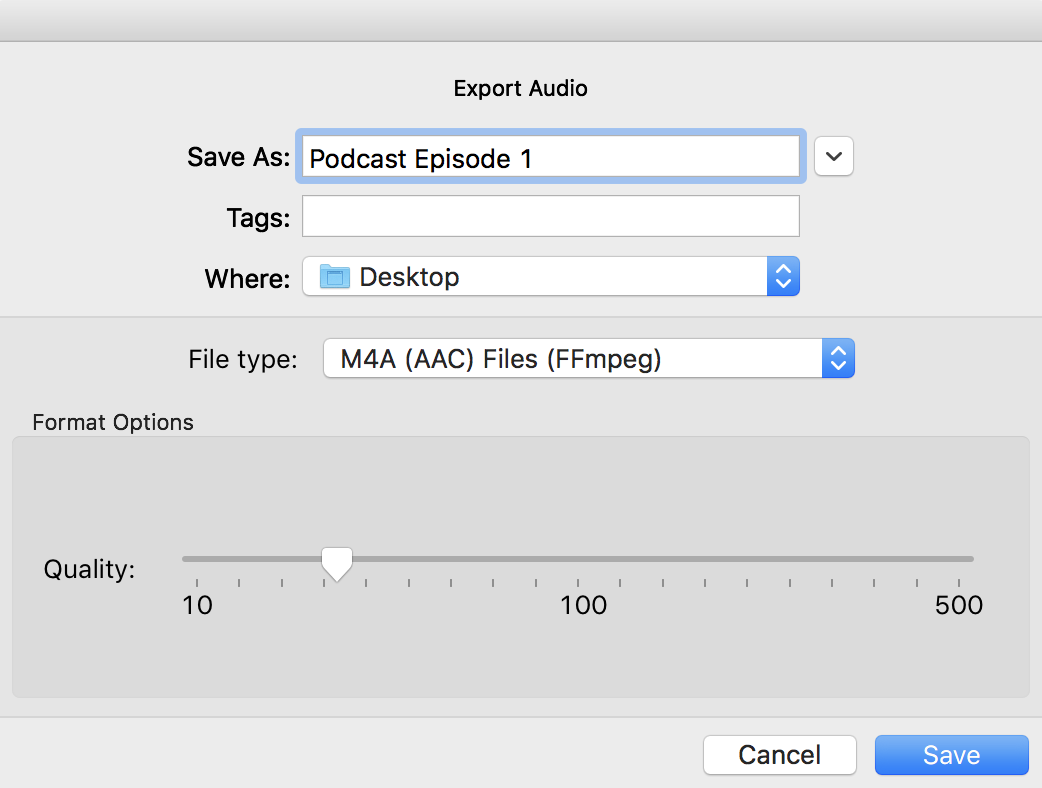
Add your podcast episode name and choose your file type. We recommend either M4A (AAC) or MP3, as they’re industry standard and are among the most popular podcast hosting platforms such as iTunes.
If you’ve got multiple audio tracks, as a result of stopping and starting, you’ll then be asked to mix them down into a single mono channel. Confirm to continue. Next, enter your show’s information (a.k.a metadata) like artist, title, and year, then continue.
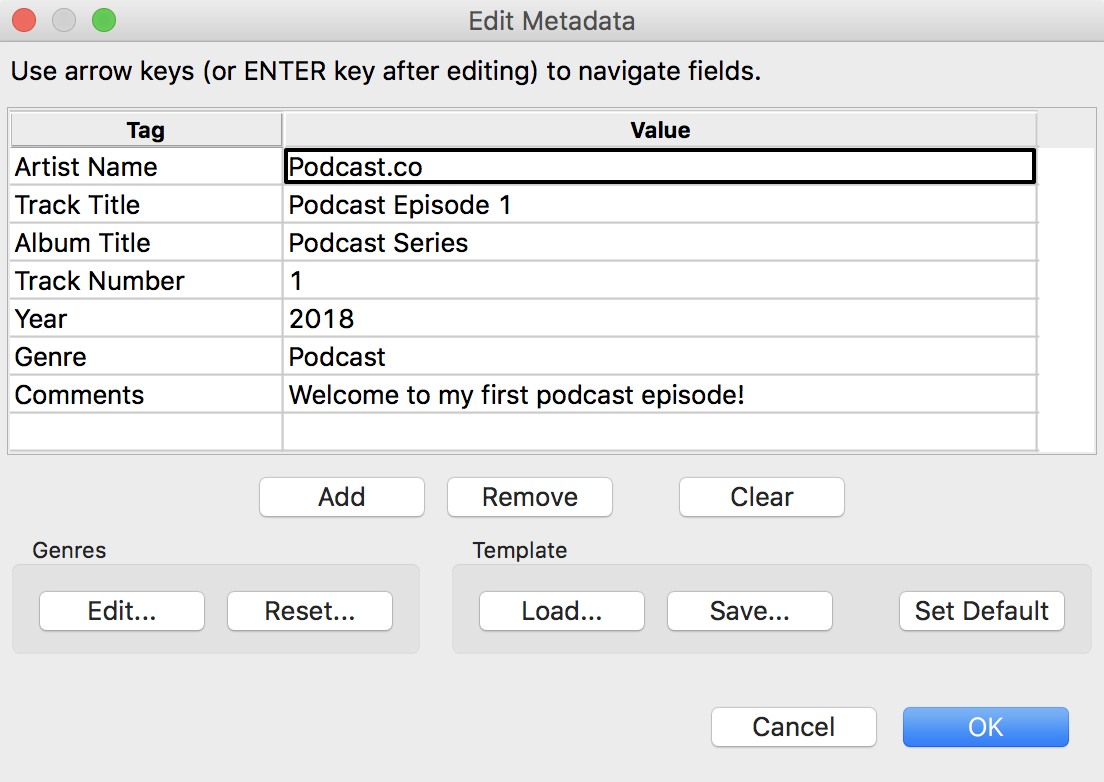
If you decide to export your podcast as MP3, you need to install an encoder known as LAME. You can download this from Audacity for either Windows or Mac. The same applies to M4A (AAC) files as you need the FFmpeg library to export. Add it in Audacity > Preferences > Library, before selecting Locate. Download the file by following the instructions.
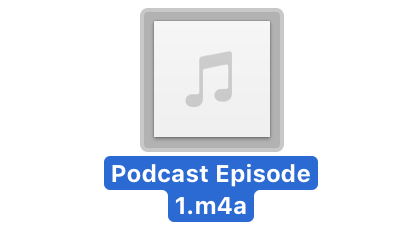
Finally, confirm to export your show in Audacity. It should then be available to listen to in your downloaded area.
Editing Your Podcast
Podcasts rarely sound their best without a bit of editing magic. Whether you’re cutting out a misspoken word, trimming dead air, or reducing distant background noises, you’re better off cleaning up your audio before publishing it. Import recorded audio into Audacity by selecting File > Import > Audio.
One of the most common problems podcasters deal with is periods of silence. Presenters may pause for a few seconds to collect their thoughts, but that doesn’t make for thrilling content. Cut sections out with Truncate Silence.
Highlight your entire recording, then go to Effect > Truncate Silence. Remove dead air by using the following settings:
- Level: -20dB
- Duration: 2
- Truncate to: 0
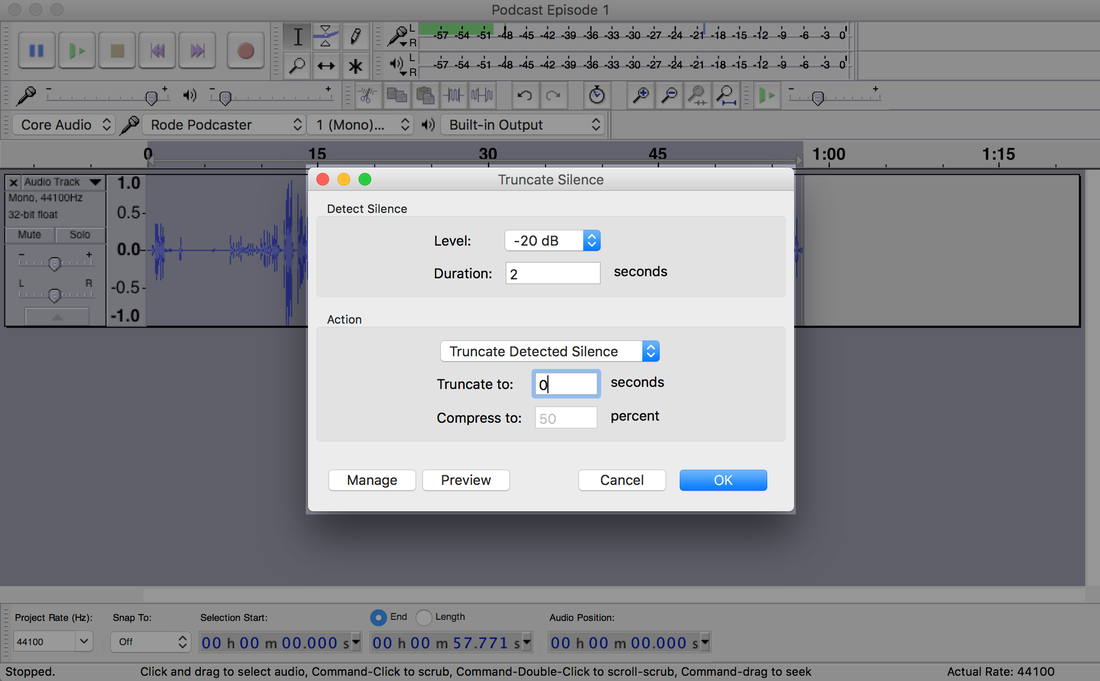
Your waveform length should now be shortened. The settings removed any audio that’s lower than -20dB and longer than two seconds.
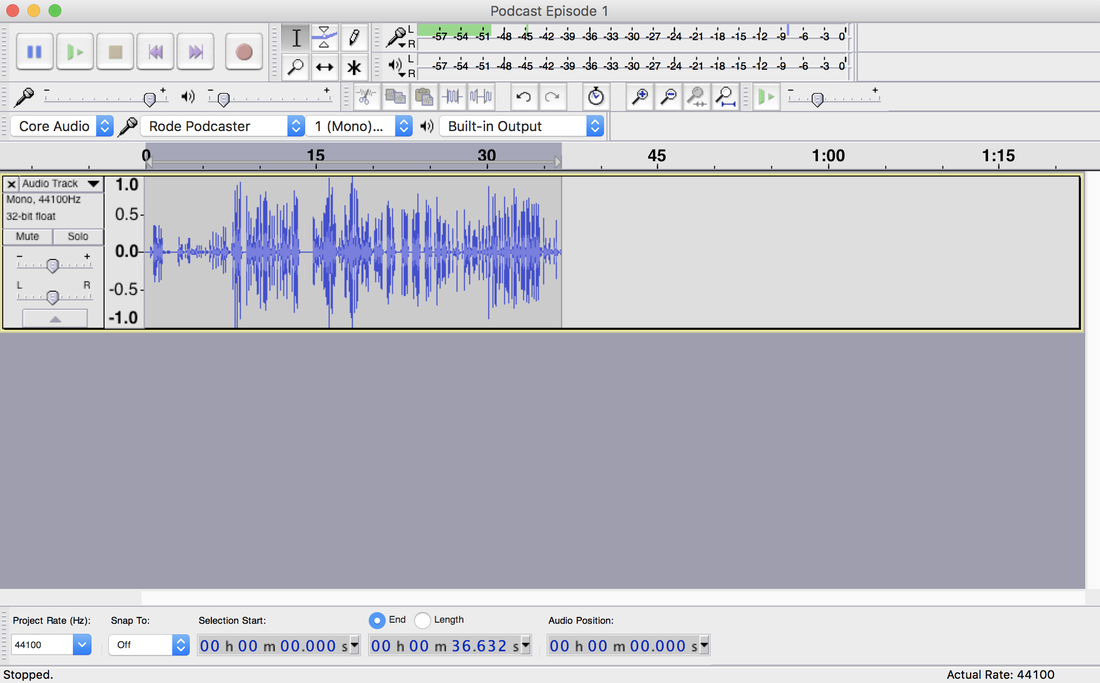
If you notice your audio sounding abrupt (or it just doesn’t sound right at all) then try adjusting the settings slightly, before previewing the audio.
There’s a bunch of things you can do in Audacity to improve your podcast. For example, amplify or normalise audio for consistent audio levels, add fade in/out, and remove background noises. For more Audacity editing tips, be sure to check out this guide.
Save Yourself Some Time
Alitu have recently added a call recorder option, meaning that you can record your interview or co-hosted podcast and have them cleaned up automatically, from noise reduction to levelling (provided the call is finished all in one place). And thanks to Alitu’s handy episode builder you can edit your recordings, add intros, outros, adverts or transitions before exporting the finished show.
Alitu costs $32 a month or $320 a year and includes a number of time-saving benefits including options for editing and tidying up your audio automatically.
Now it’s showtime. Your audience awaits. And if you’re still left with questions, be sure to check out our full How to Start a Podcast guide.


