Why Podcast Audio Levels Matter (& How to Set Them)
Make sure you sound your best. Fix your podcast audio levels so you always sound professional, even when your recordings aren't.
Ever get your podcast recordings into the edit and- DARN! One microphone recording is louder or quieter than the other and now everything sounds weird and off balance. If you publish your episode like that, nobody will want to listen! Time to work some magic and fix those pesky podcast audio levels!
Fix Your Podcast Audio Levels 🛠
Work on doing your best to correct podcast audio levels during recording. Do a few test recordings to see how they go first and use those to set your levels correctly. Here’s a quick-fire troubleshoot list:
- Echo: If your voice sounds echoey, it may be because you’re too far away from your mic. Get closer and try again.
- Harsh P/B/K Noises: If any word with the letters sound strange and distorted like P and B, this is because you are exhaling air into the microphone on to make these sounds. Move the microphone up and angle it down towards your mouth, this should counteract the effect.
- Weird Background Noise: Got a fan? Turn it off. Computer on? Turn it off. Sometimes even your mobile phone can release a whiny noise on audio recordings. Try turning things off or moving away from noisy objects in your recording area.
- Rumbling: This is due to vibrations being picked up by the microphone. This can happen if you live near a train line, road, or even just from jigging your leg out of nervousness! Maybe invest in a shock mount for your mic to help it a little.
How to Fix Broken Audio 🎧
If you do end up getting your recording back into editing and the podcast audio levels do need fixing, that’s alright. There’s a lot you can do to clean that up and make it sound better! In these examples, we’re going to be using Audacity which is completely free editing software that a lot of pro podcasters use!
Audio Too Quiet? Amplify!
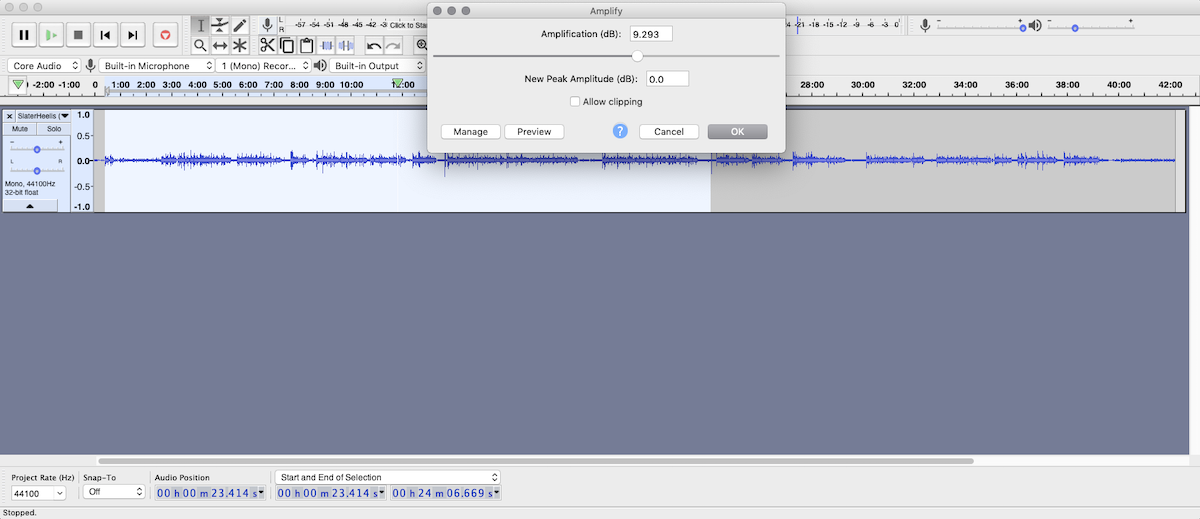
If your audio is too quiet, head to Effect on the top Navigation bar in Audacity, and then Amplify, you’ll be able to play around with this.

Essentially, what Amplify does is it will increase your selected tracks by however many db you input. So, if you pop 3 into the type box, it will increase the volume of selected tracks by 3db. Just make sure you leave the box unchecked that says Allow Clipping. If you leave this checked, it will allow your audio to clip over the highest volume on the range, which can lead to some serious distortion. Nobody wants that!
Audio Too Loud? Normalize!
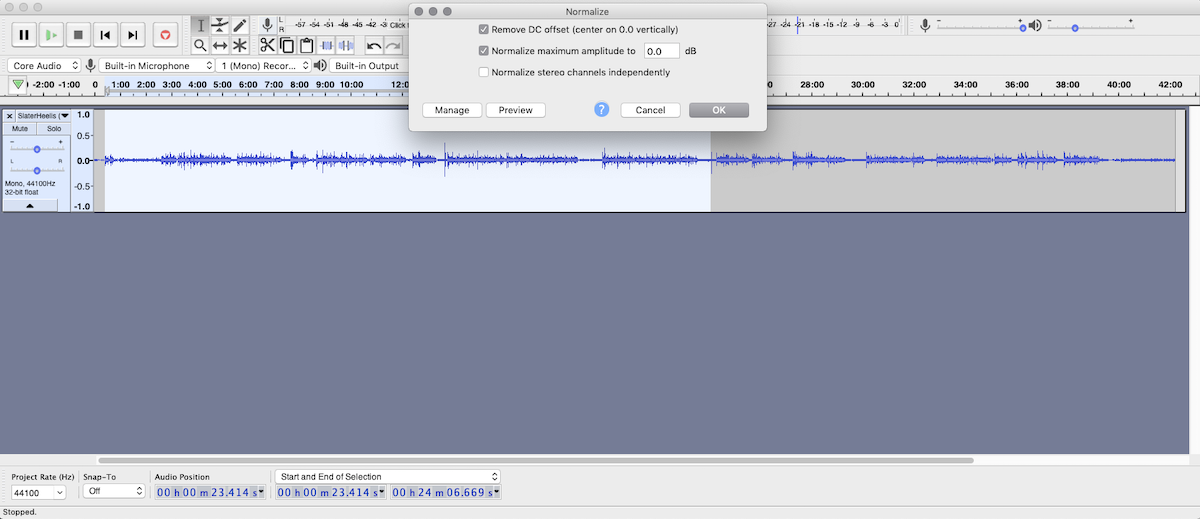
Normalize is similar to Amplify, but it’s better at making louder audio a bit quieter. Again, head to Effects in the top Navigation bar and then Normalize.
Note: This will not fix clipping. If your audio has clipped you will need to re-record.

This will adjust all your selected audio to have the same peak level. So if you set it to -3db, all your audio will only go as high as -3db in volume. A handy tool for balancing the volume of your audio without making everything too loud!
Need Some Fine-Tuning? Equalization!
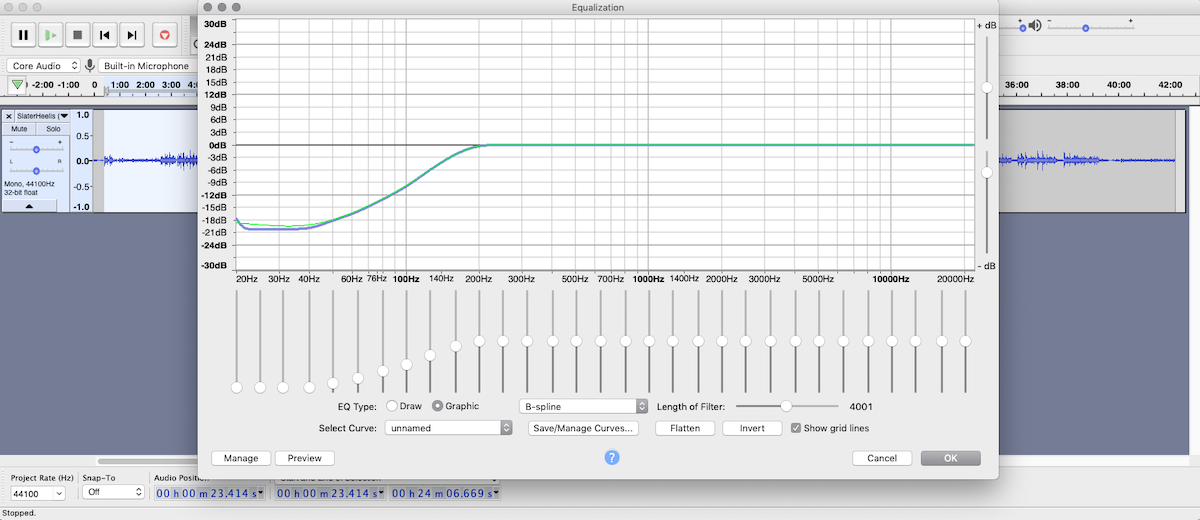
You’ve probably seen this shortened to EQ before. This is great for fixing those pops in your podcast audio levels because of harsh P, B or K sounds. As usual, head to Effects in the top bar, then Equalization.

You should see some options letting you choose between Draw and Graphic. Select Graphic and then you’ll see this bunch of sliders that will let you raise and drop different parts of the frequency. To remove those tricky pops, make sure the first 4 sliders are at around -20db, and then the next 8 sliders go up by 2db until around the 200hz mark. This should sort out those annoying harsh sounds!
Hire Professional Audio Editors 💪
All of this might look a little complicated, and you might not want to waste loads of time cleaning up your audio. We get that. So why not hire a professional audio editor to do that bit for you? Our editors are highly skilled and can offer quick turnarounds when needed, saving you that precious time that could be spent coming up with more cool ideas! 👇👇👇


