
Listeners nowadays expect audio to sound clear and professional. Most people won't stick around if levels are off, there's loud noise in the background, or even if there are too many "uums" and "errs". Sound your best, edit podcast audio in Audacity to produce high-end quality shows with easy to use tools for beginners.
Why Edit Podcast Audio in Audacity?
Although there's plenty of software available, Audacity is one of the best because it's simple and easy to use. Edit podcast audio without knowing a lot about editing, not to mention it's:
- Free: Unlike most editing software, such as Adobe Audition, Audacity is completely free.
- Cross-Platform: Available on Mac, Windows, and Linux, so you can edit on anything.
- Essential Tools: Easy to use features means everything just works.
For newcomers and those wanting basic, easy to use tools, Audacity is the best solution. Download Audacity and edit podcast audio in minutes.
Recording Episodes
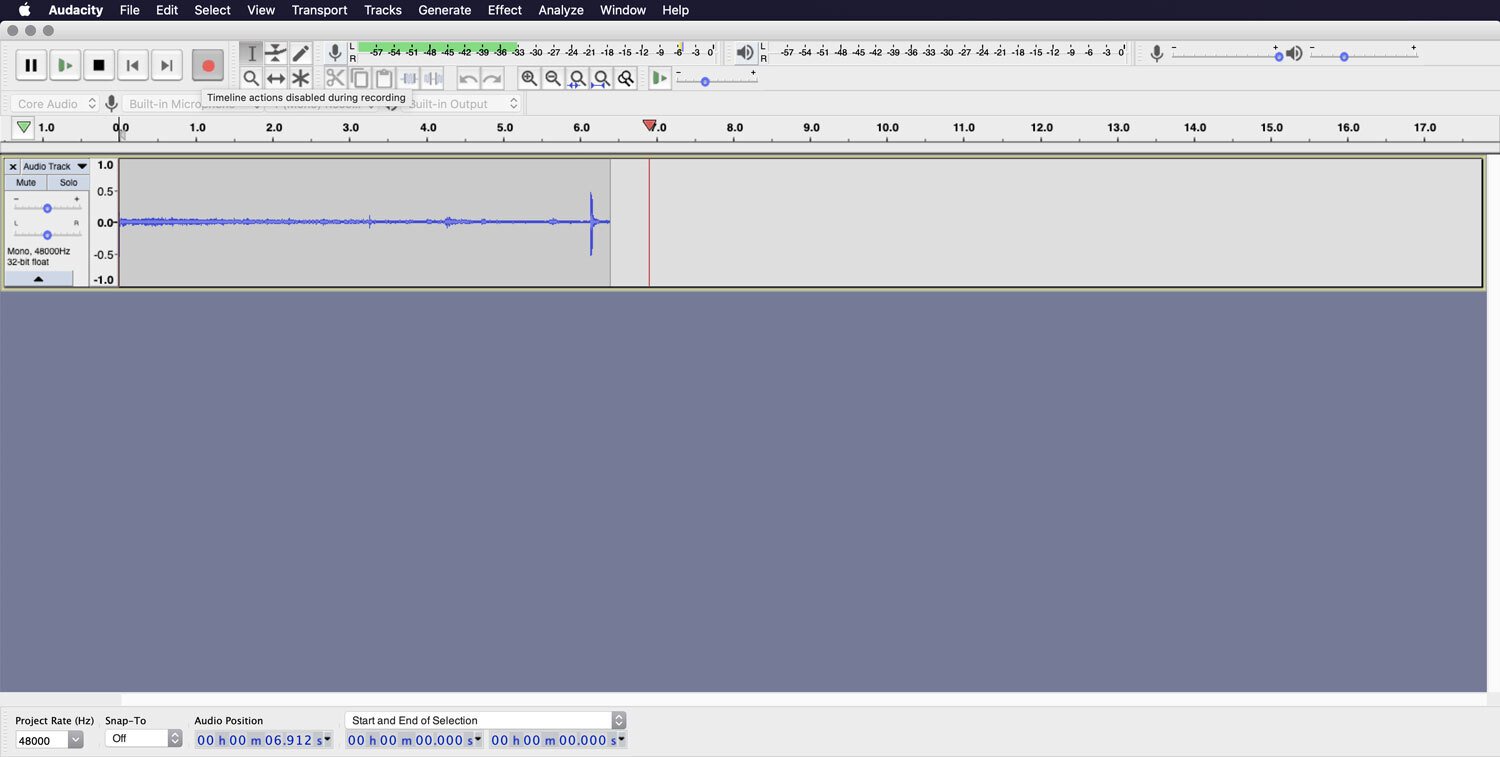
Recording using Audacity is super easy! Make sure your audio interface is selected in the audio preferences drop-down list, and then double-check your levels by clicking on the levels bar at the top to start monitoring. As long as your levels are between -9db and -18db, you’re good to go! Click the record button once you’re ready to get going!
Importing Audio
If you’ve already recorded your audio, you can easily import into Audacity to edit podcast audio. Just click File, at the top, then Import, and Audio. Choose the audio file you want to import into Audacity, we would recommend sticking with using WAV or AIFF formats as these preserve sound quality the best.
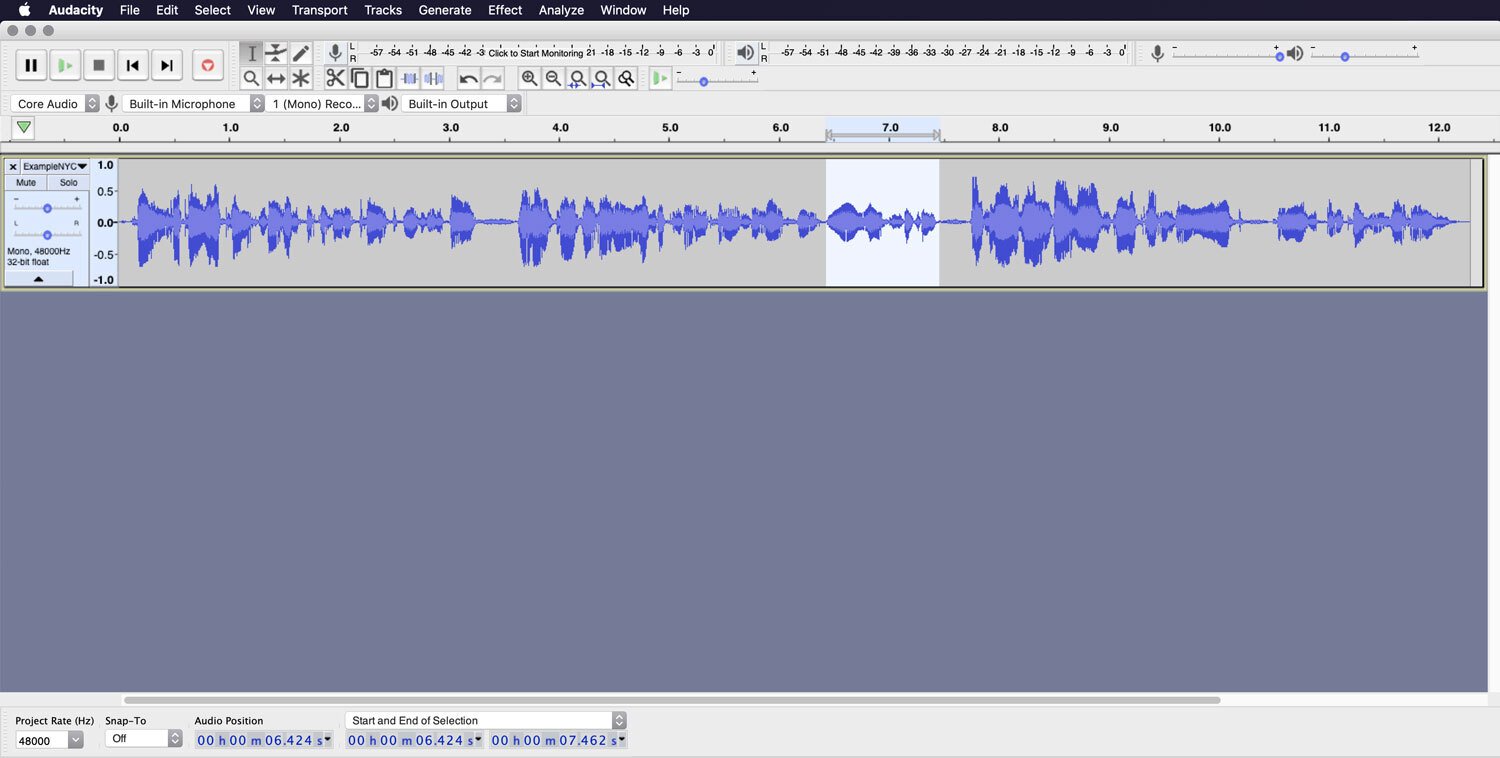
Cutting Audio
Cut out any silences or filler words, like “umms” and “errs”, then you can just click and drag to highlight the audio you want to cut, then hit the delete key on your keyboard.
Removing Background Noise
Sometimes microphones can pick up the audio from the room you record in, or some background static which comes out as a low-level humming noise. You can spot these on the waveform as constant low waves, if you can’t quite see them, you can use the +magnifying glass to zoom in.
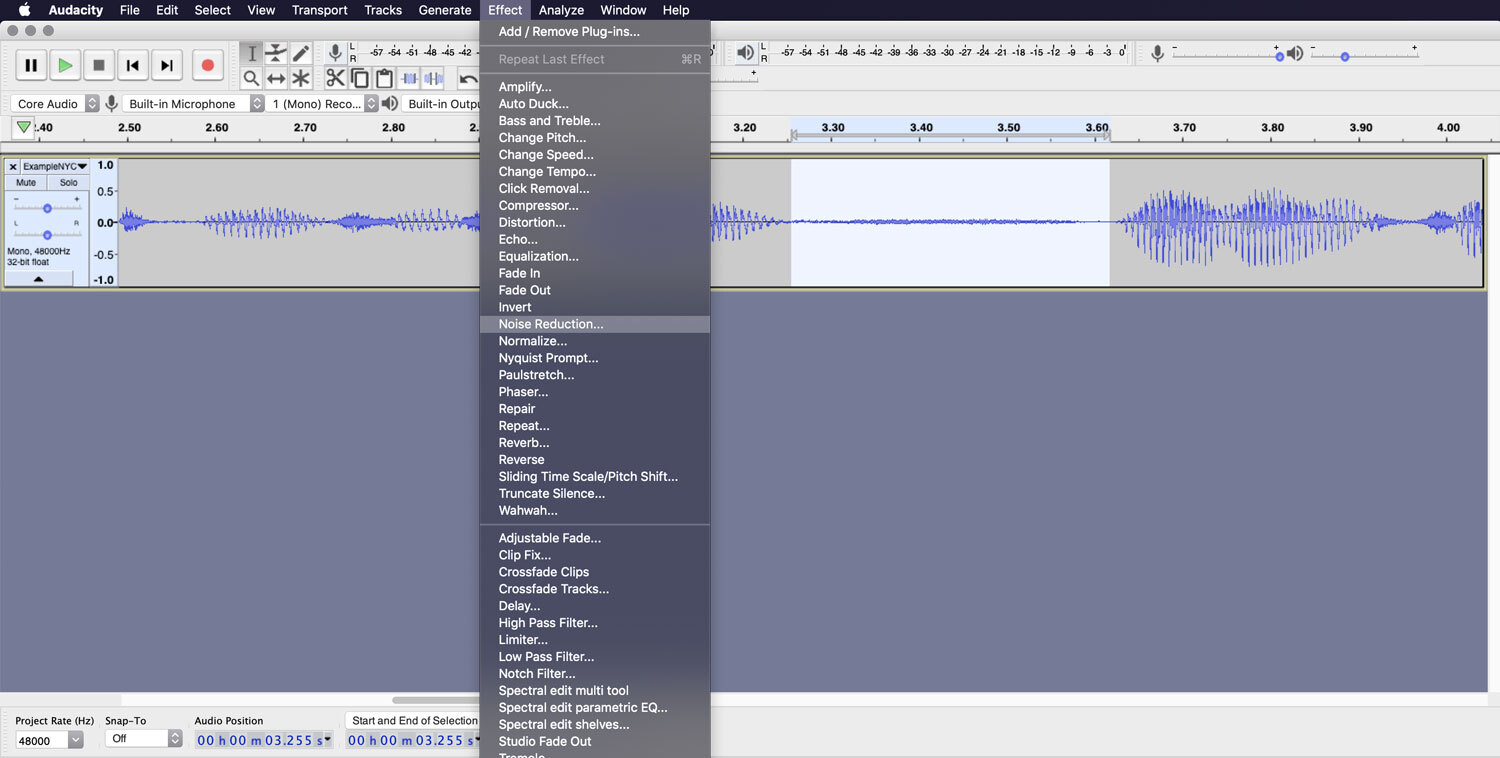
To remove this background hum, just highlight a section of the background noise. Then click Effects at the top, then Noise Reduction, and then select Get Noise Profile. This captures the print of the highlighted noise, ready to remove it.
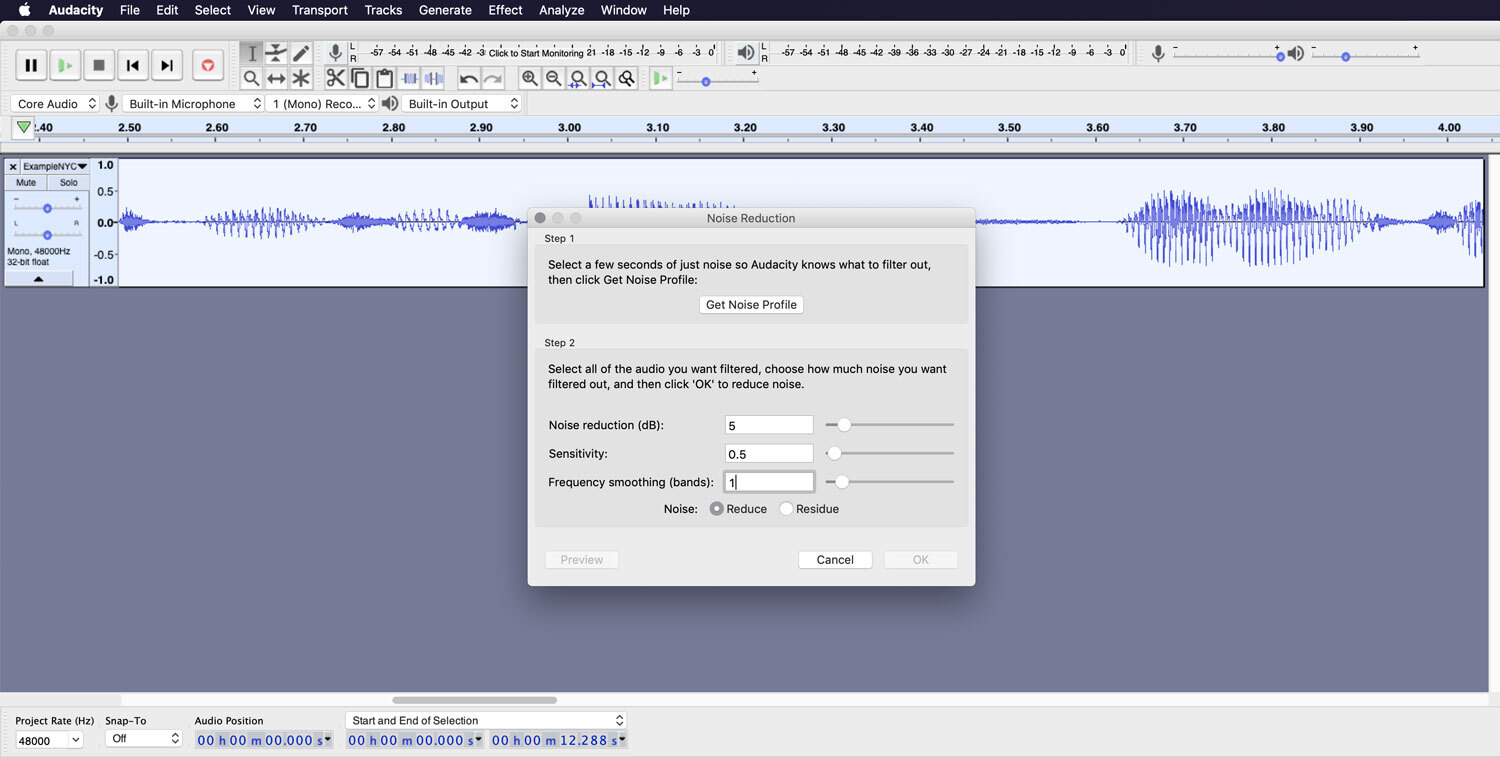
Then, go back to the whole audio file and highlight it all. Click Effects and Noise Reduction again, then adjust the Noise Reduction (dB) to 5, Sensitivity to 0.50, and Frequency Smooth (Bands) to 1. Then confirm the changes by clicking OK.
Play some of your file through to see the changes that the noise reduction has made. You may need to go back and adjust some of the settings further to remove the background noise completely.
Fading In and Out
Fades are a nice way to transition in and out of your show, and it just makes it sound that bit more professional. Highlight the start of your podcast episode, then click Effects and then Fade In. Then highlight the end of your podcast episode and go to Effects and then Fade Out.
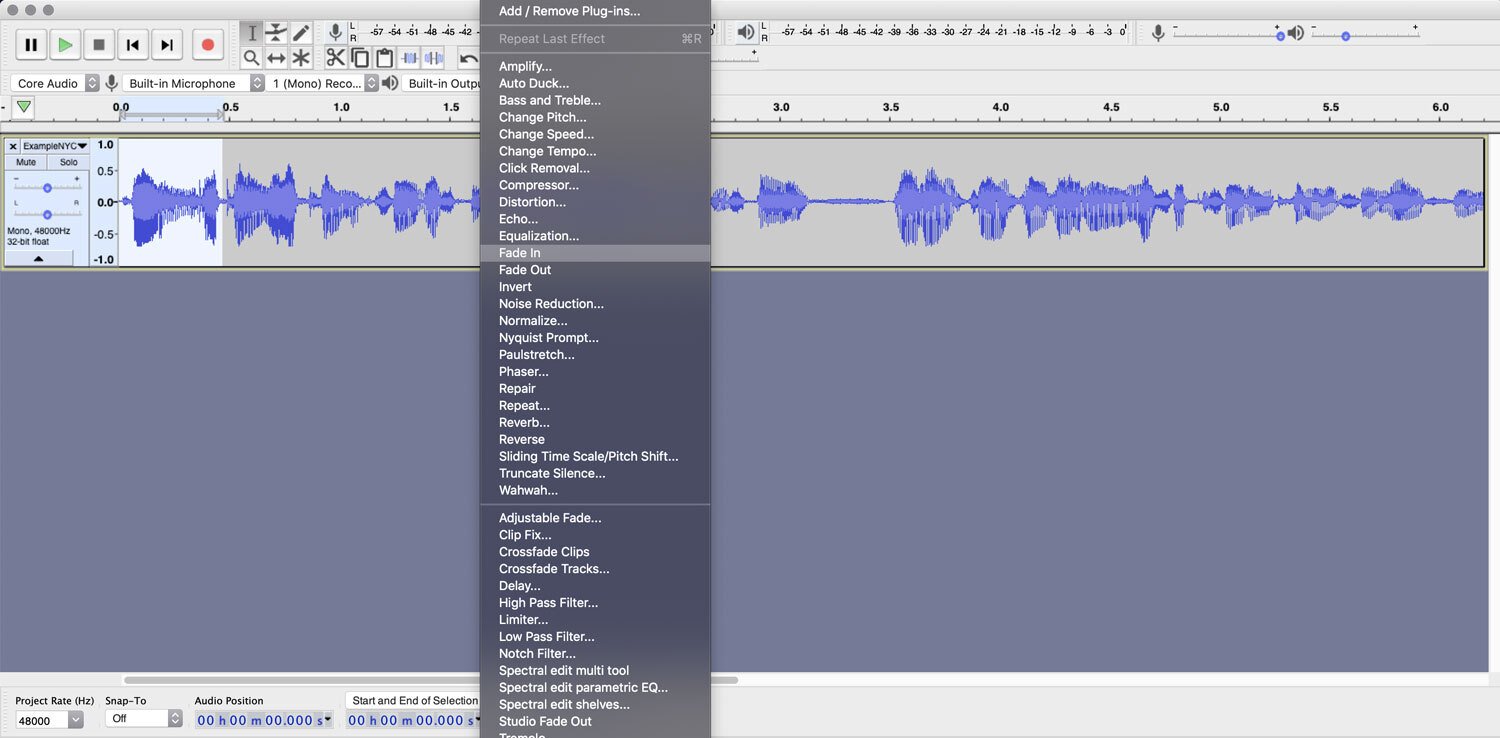
These fades should only last for a few seconds each, but don’t make them too short as they can turn out a bit abrupt.
Amplify and Normalise
If your audio is too quiet or too loud, you can adjust that by amplifying or normalising it. If your audio is too quiet, select the portion of your track or the whole thing, and then go to Effects and then Amplify. Here you can either adjust the slider, or type in a dB number. Click Preview to listen to the changes and keep modifying the dB level until it’s at a decent level.
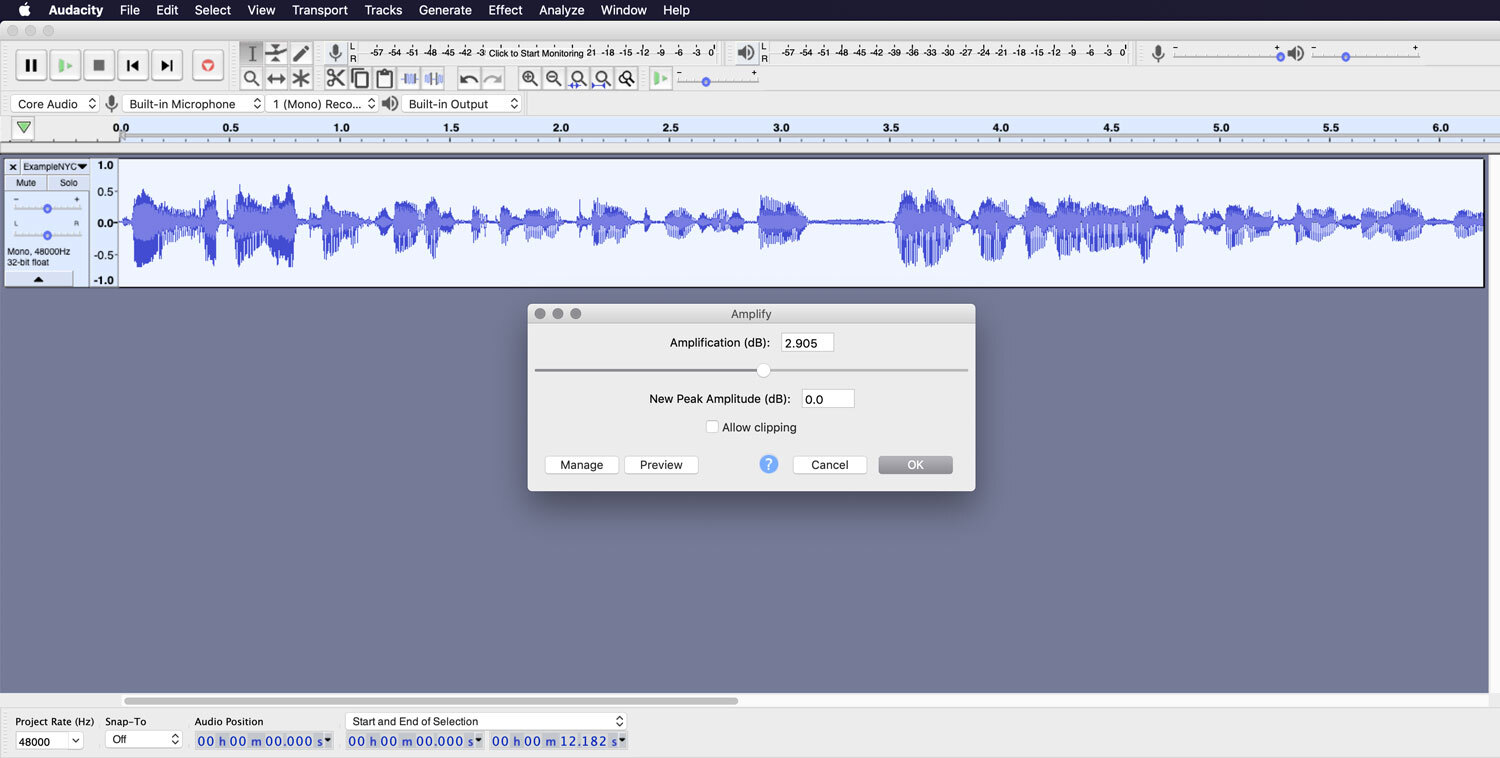
Instead, if your audio is too loud, again, you can select the audio that’s too loud, then go to Effects and Normalise. Enter a dB maximum amplitude you want to set as the limit for your audio, and preview the changes.
Compression
Extreme peaks and dips in the waveform can sound very harsh on the ears in comparison to the rest of the audio, but this can be fixed. You can bring the volume closer together to level it out. Highlight the whole podcast episode, and then go to Effects, then Compressor.
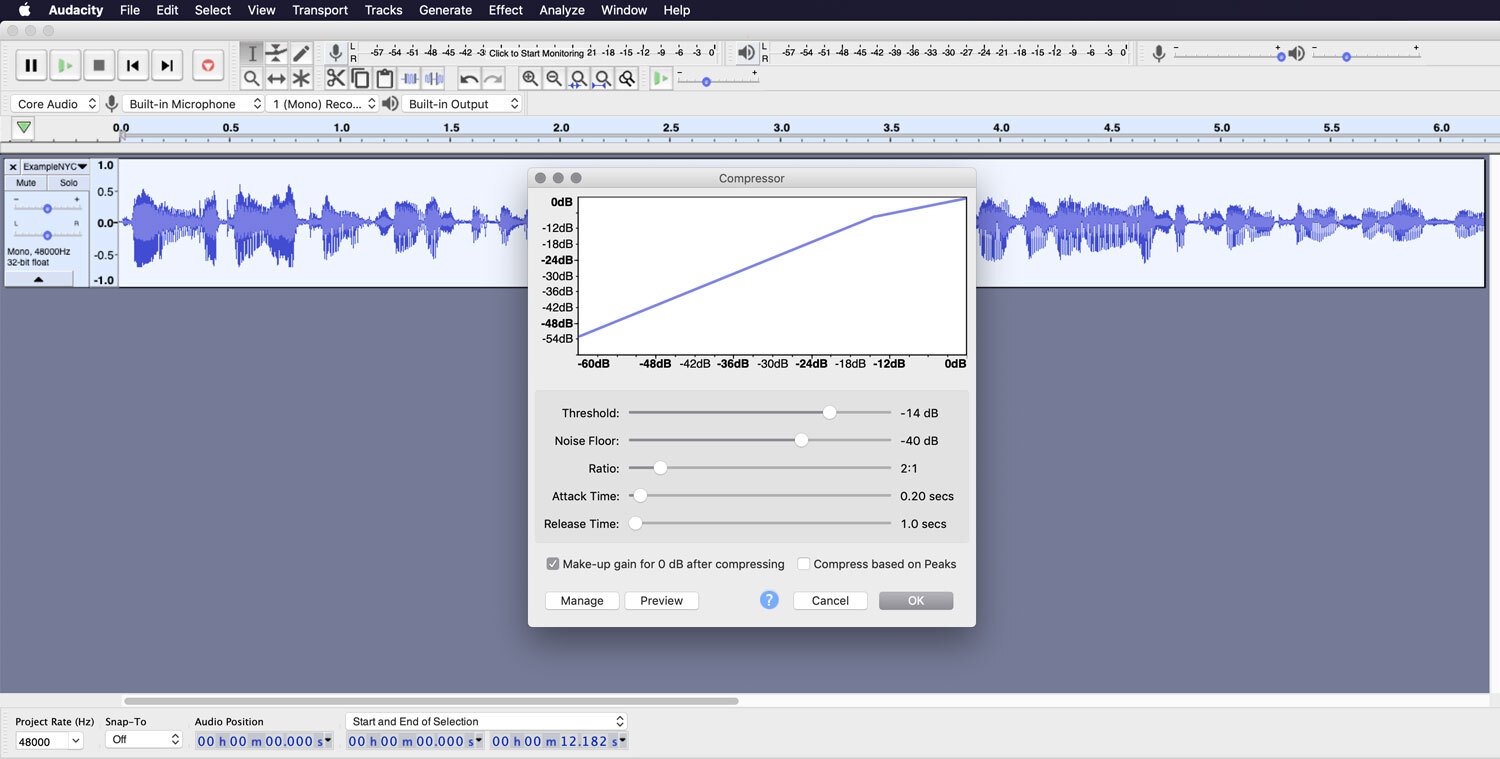
Then just adjust the Threshold (-14dB) and Noise Floor (-40dB), and preview the audio and keep making adjustments until everything sounds like it’s on the same level.
Removing Plosives (AKA Nasty P Noises)
When your microphone is angled below your mouth, your recording will have some pretty breathy, nasty popping noises in it whenever you say any words with P’s in them. You can usually see these pretty easily on your waveform, by looking for short, large spikes in the wave. You can easily minimise these.
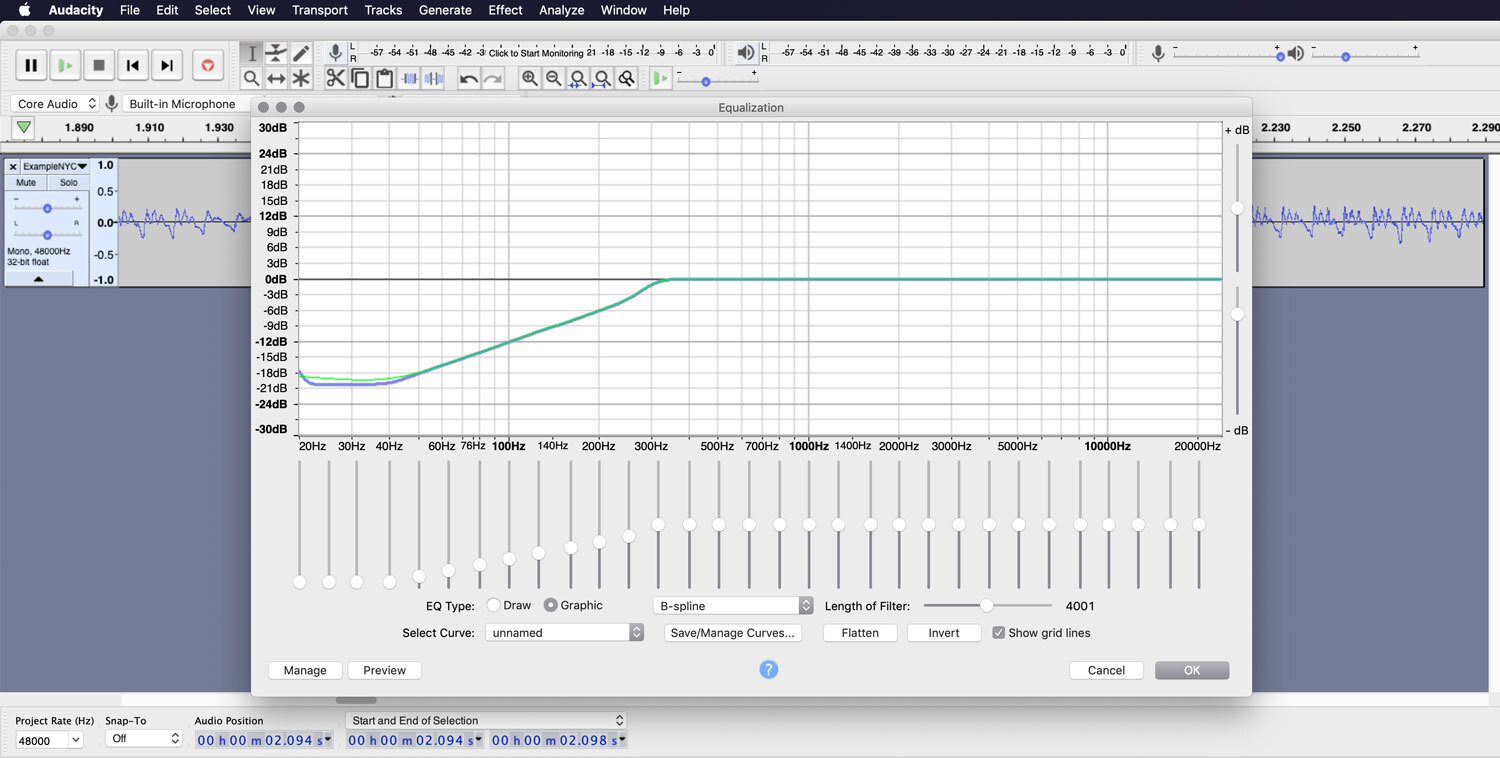
Highlight your plosives, then go to Effects and Equalization. You should see a flat across 0dB, but if you don’t, just click the Flatten button. Then click Graphic EQ, and this should bring up some sliders so you can adjust the wavelength manually. Set the first 4 sliders on this to -20dB, then put the next 8 sliders up by -2dB each until just past 200Hz. Then just leave the rest of the sliders as they are.
Save this set up as something you will easily remember, like Plosive Fixer. Then click OK and the highlighted bits of your audio should fix themselves. You can also reuse this set up now as a preset!
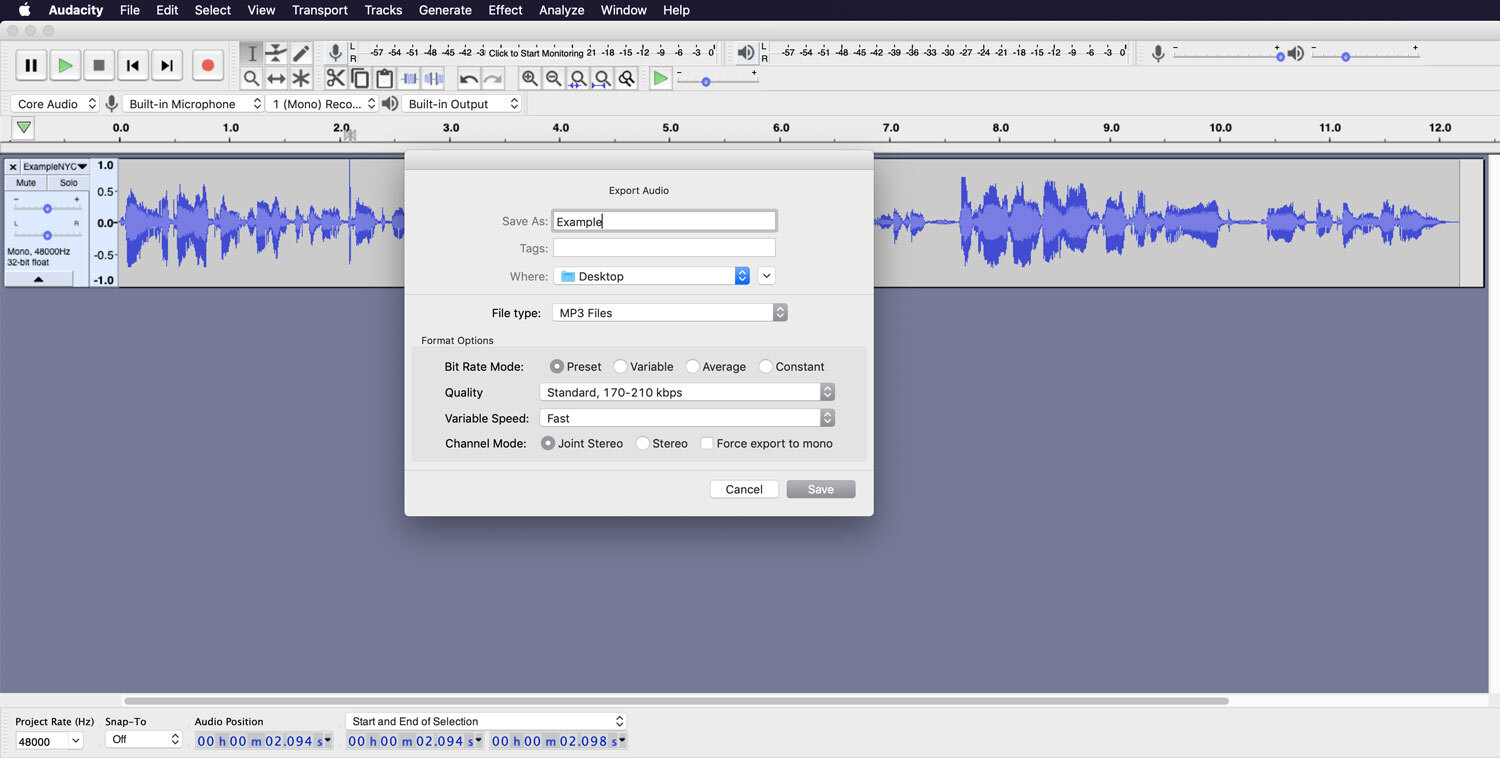
Exporting Audio
When your audio is all clean and ready to be published to your podcast, you can export your episode. To do this, just go to File, then Export Audio. Type in a name for your audio file, select where you’d like to save it to on your computer, and make sure your File Type is set to MP3. You don’t need to adjust any other settings.
You can adjust the metadata for your track here, but this is not 100% necessary as you can adjust episode details when you upload to Podcast.co.


