Editing Podcast Audio Using Audition
Take Adobe's beloved software for a quick crash course, editing podcast audio using Audition to make your shows industry-level professional.
Editing podcast audio using Audition can seem daunting, especially for someone who might not have edited before. Make life a little easier by learning shortcuts, powerful editing tools, and other simple ways to make you shows sound better in Adobe Audition.
Recording Audio
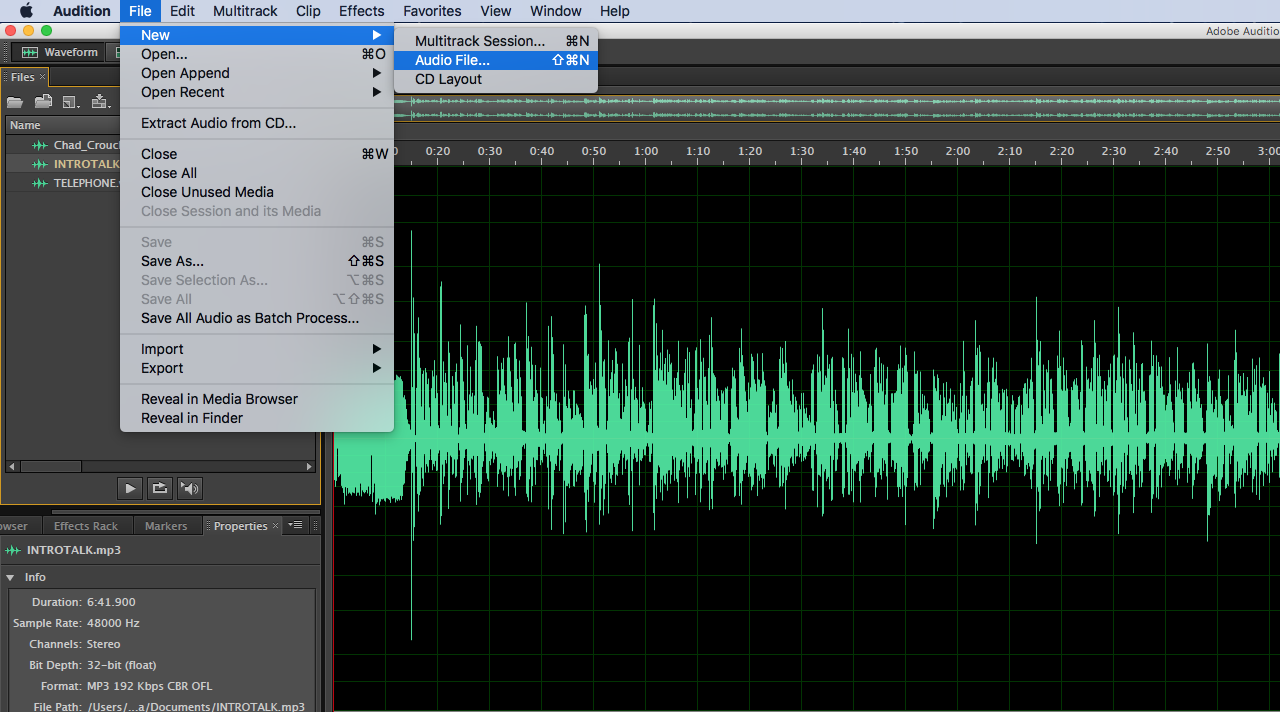
You can record audio files in Audition directly. You’ll need to go to File > New > Audio File (Shift + Cmd + N), which will create a new audio file. Then to record onto this audio file, you’ll need to hit record at the bottom and record what you want, then click Record again or Stop to stop recording.
Trimming Files
During your recording, you may have coughed or said “ummm” too many times, so you will defeintly need to remove them. There are two ways of doing this.
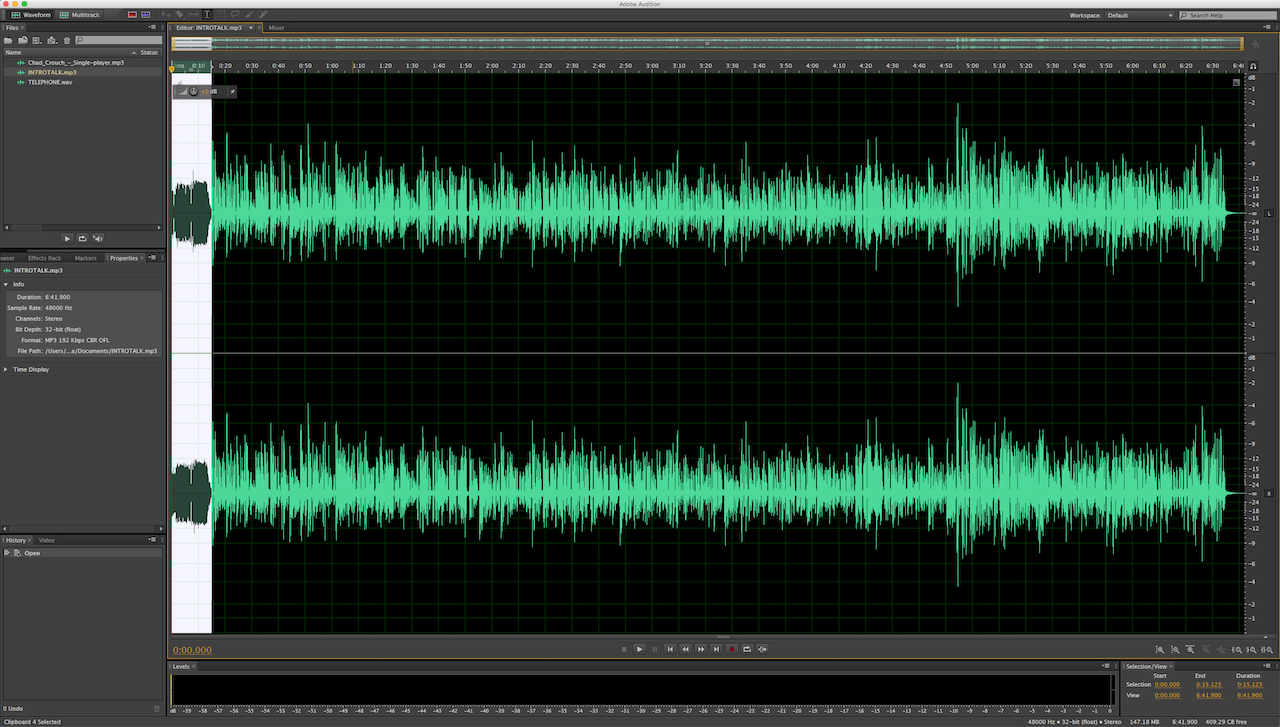
The first way is simply highlighting the section of audio you want to remove, and then pressing Delete on your keyboard. The only problem with this method is that you might hear a jump in the audio where you cut a bit out. This method is generally more useful for removing things at the beginning or end of your recording.
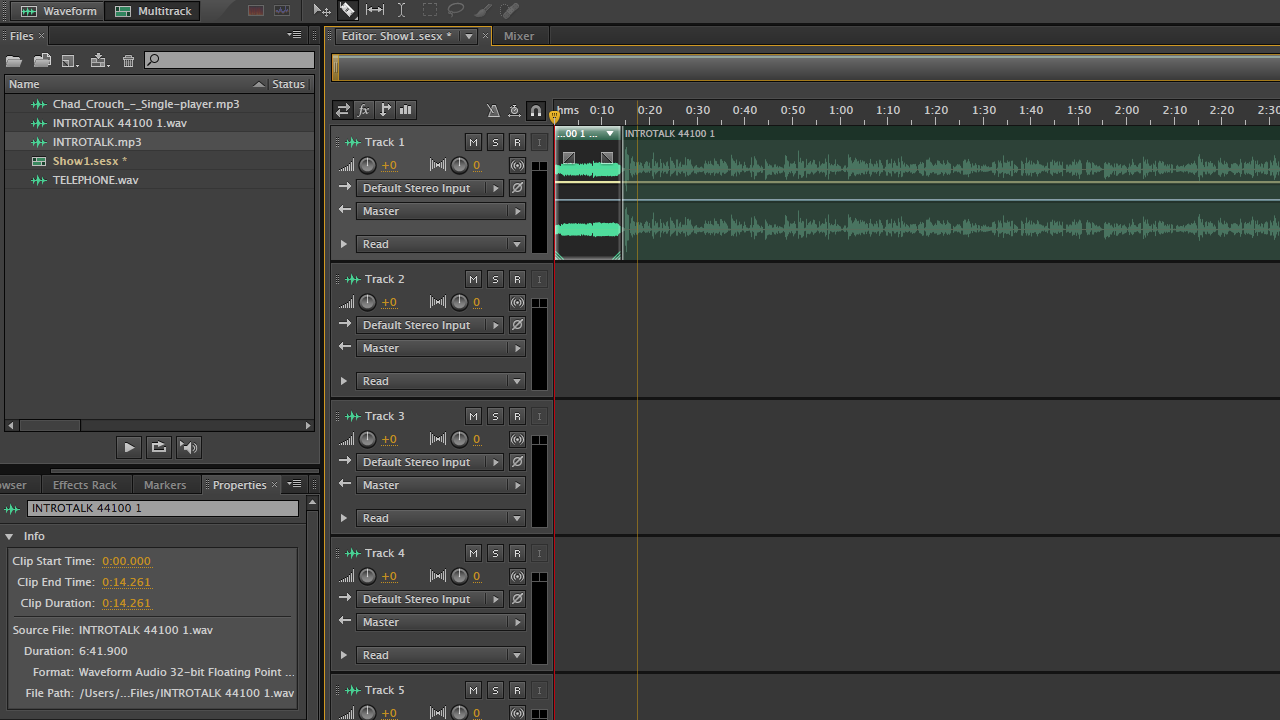
The second way is to select the Razor Tool (R) in the top toolbar. You can use this to make a cut before and after the part of audio you want to remove. Then select the chunk of audio you’ve cut out, and press Delete on your keyboard to get rid of it.
Adding Audio Files
To add in audio files, you can either drag and drop them into the little library box, drag them directly onto the timeline, or click the Upload Media button (It just looks like a little file!).
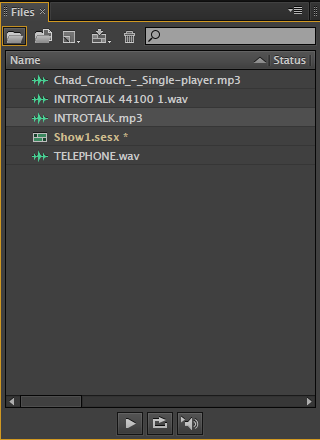
You can then add these to whatever track you like in the Multitrack Session by dragging and dropping them where you want them.
Multitrack Sessions
This is where you will do the bulk of your editing. You’ll need to open a new Multitrack Session by going to File > New > Multitrack Session (Cmd + N) or just clicking the Multitrack button at the top.
In the Multitrack area you can see there are quite a few tracks, and you can think of these as layers. This is how you will layer music underneath talking, for example. For this example, we’re going to be layering Music, Speech and a Sound Effect.
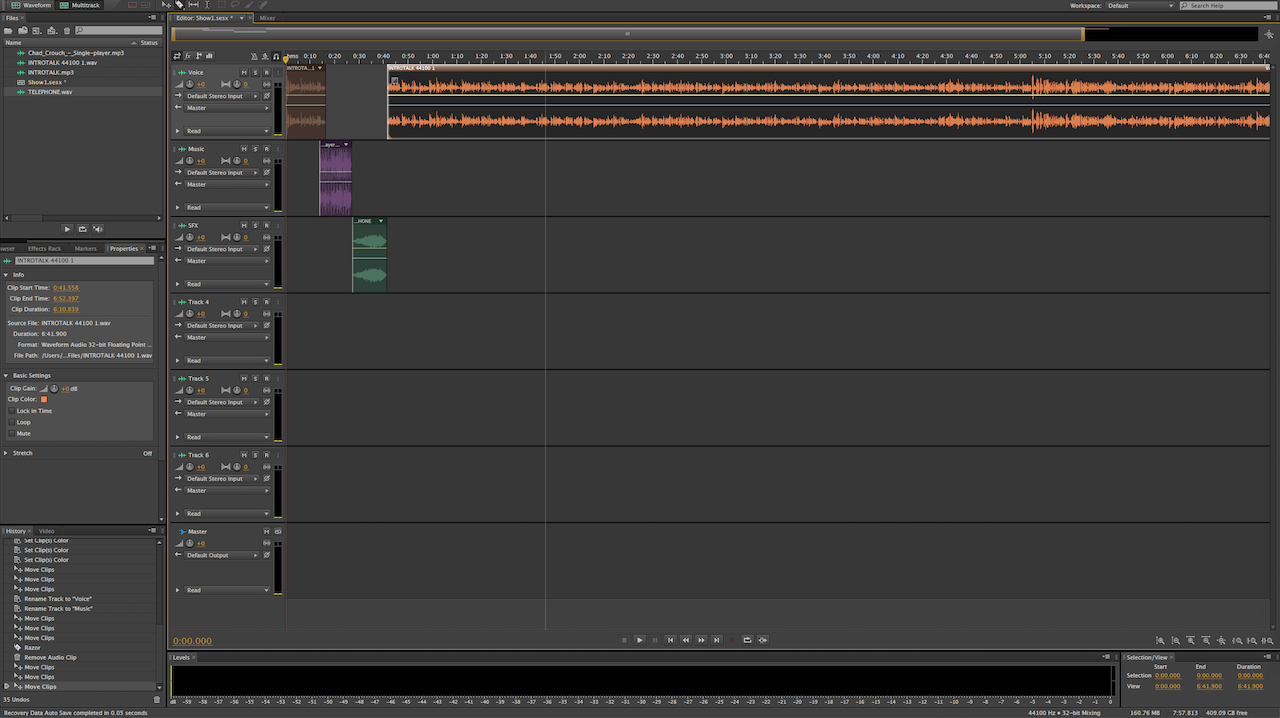
In this area, you can drag your audio files around to make them play out exactly when you want them to. For example, this will be the introduction to our podcast, so we have the host briefly introducing the episode, followed by the opening jingle, then a sound effect of a telephone, then the host continuing the episode.
Ducking Volume and Panning Sounds
What about adjusting the volume of music so it sits under the host talking? Or adjusting an interview piece so one person is on the right and the other on the left when you listen with headphones? Well, you can do that in Multitrack too!
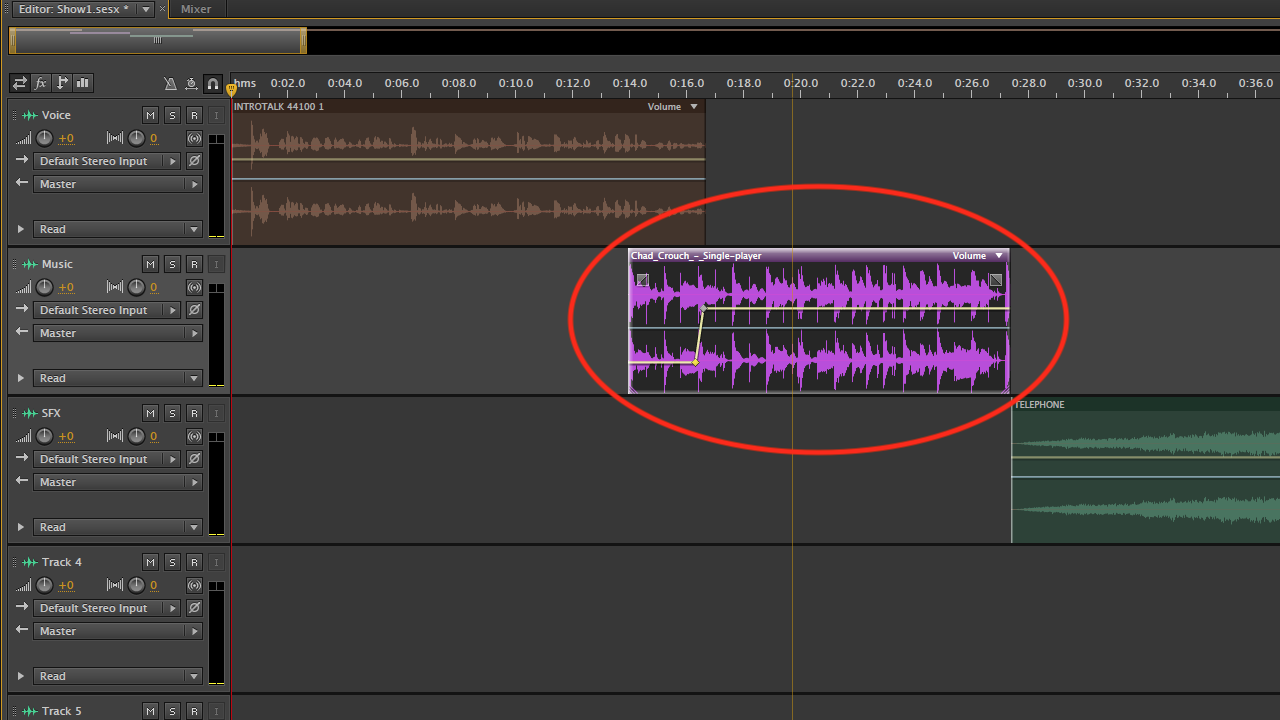
This yellow line is the clips volume gain. Using this you can adjust the volume easily, making it fade in and out. Click wherever you want on the line to add in a Keyframe. Think of these like pins. Then slightly further down the line, we’ll add another Keyframe, then click and drag this one down. This now means that the volume will follow the line, getting quieter as the line goes down.
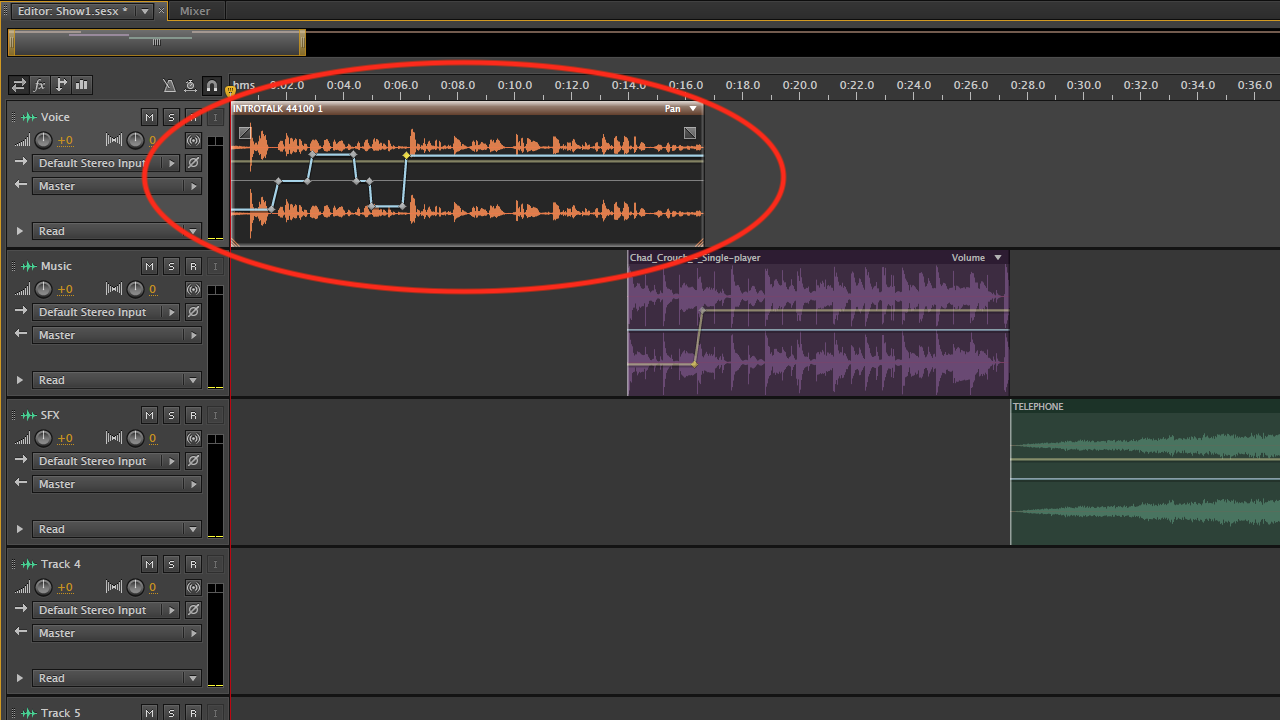
The white/grey line is the Panning on the clip. This line determines whether the clip will sound more on the left, right or centre. You can add Keyframes to this too to pan the audio from left to right, with left being up and right being down.
Editing Podcast Audio Using Audition
The basics of editing podcast audio using Audition are easy to master, but there are loads more you can be doing to sound better. Whether you don't have time or just want to sound your best, we can help. Hire us to edit your shows to create smooth, high-end audio experiences, whether that's for you or your client.


